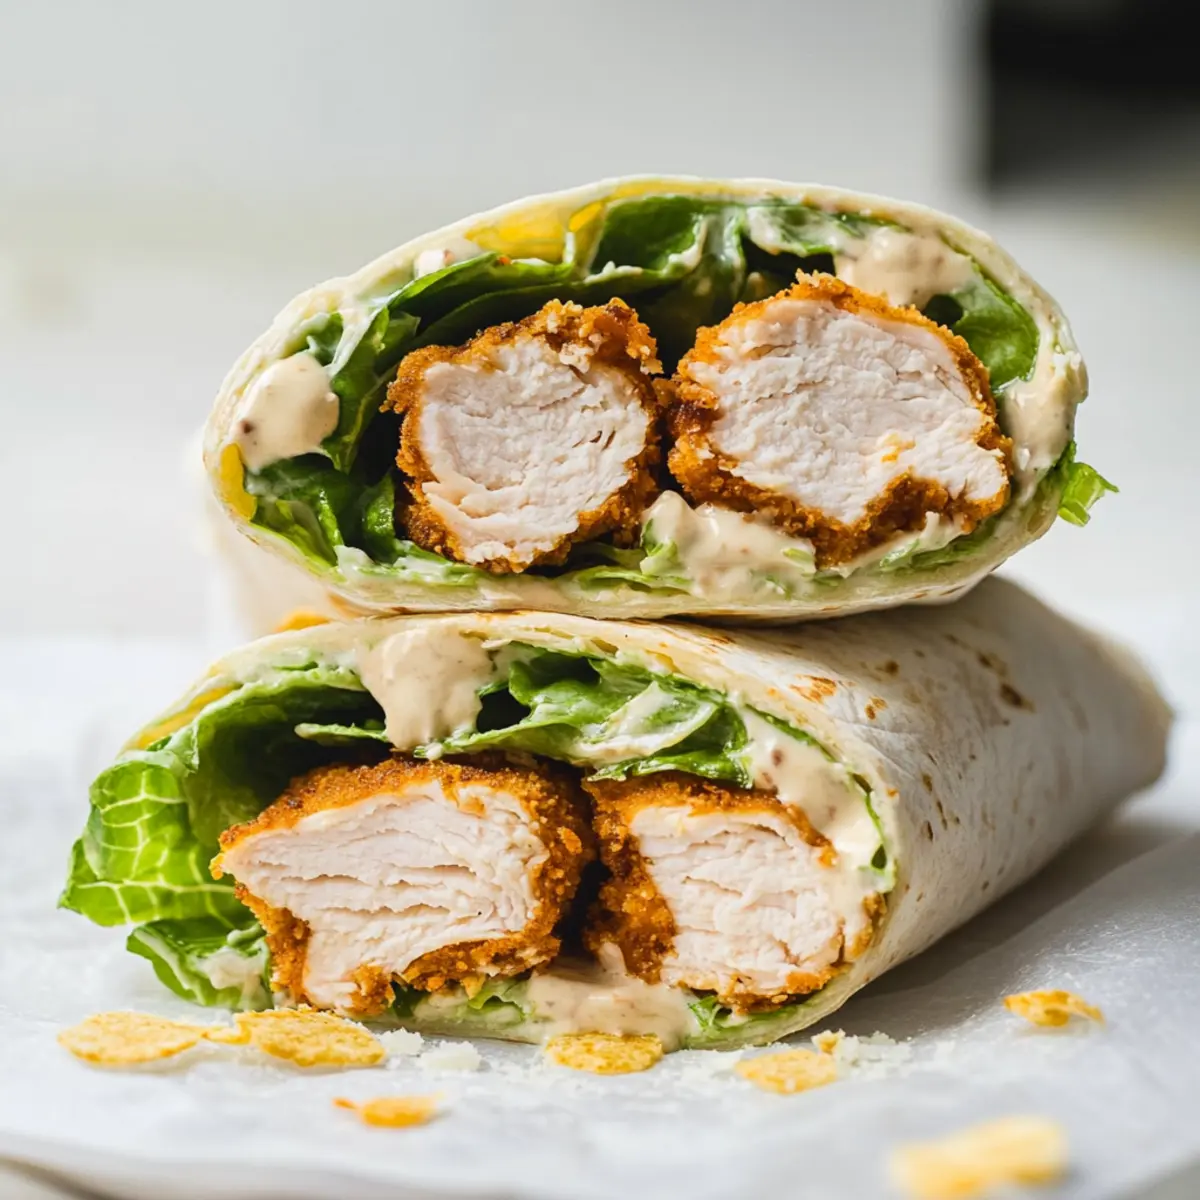
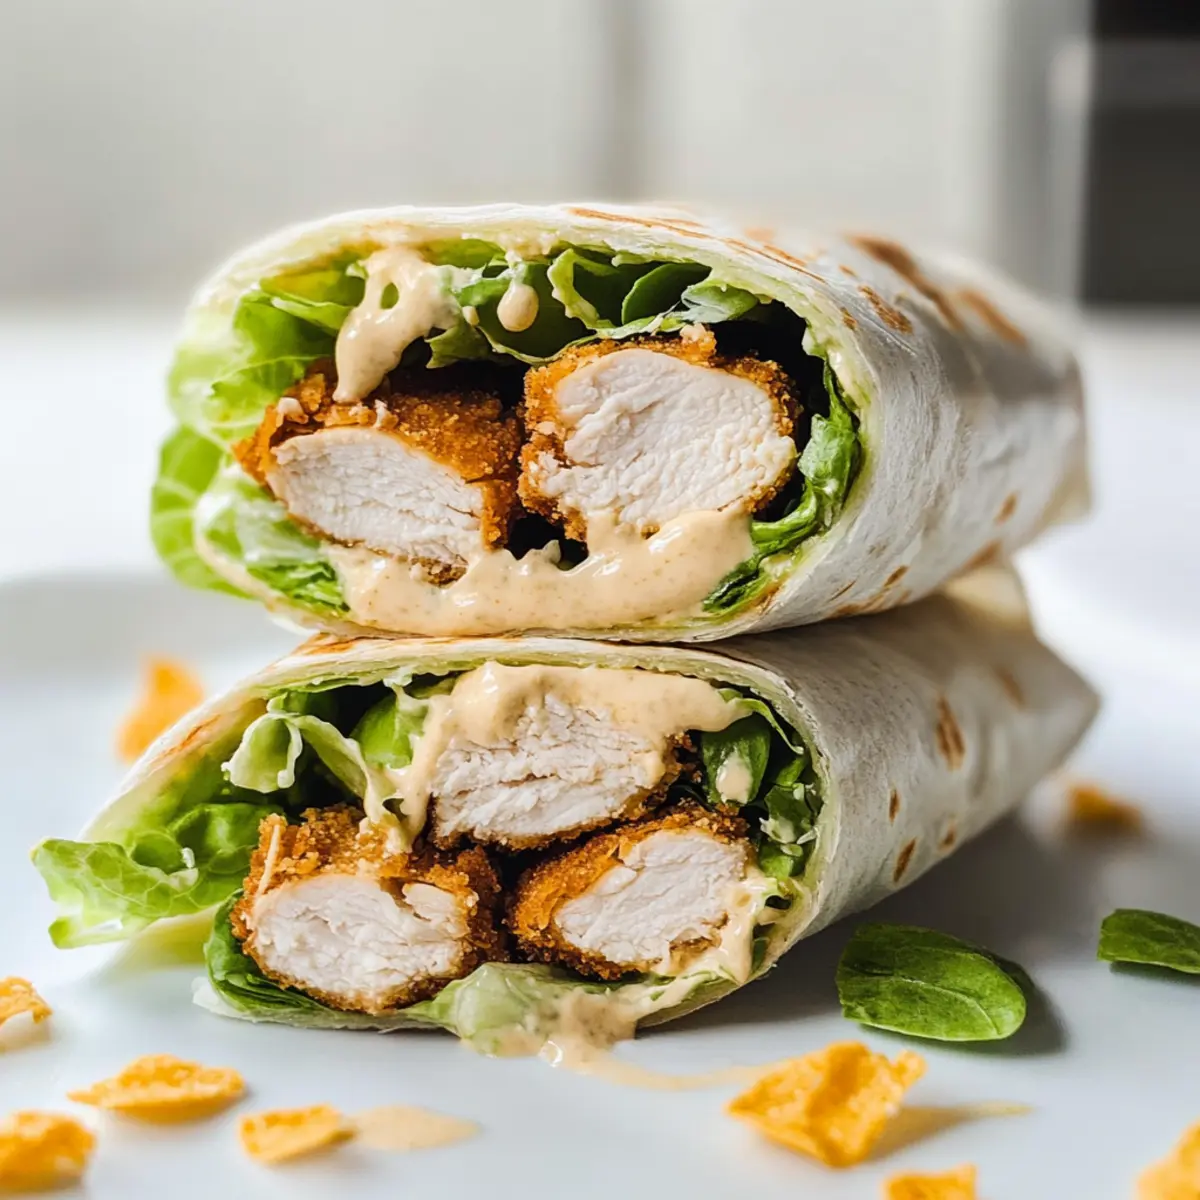
“Wait, is that a salad wrapped in a tortilla?” I overheard someone exclaim while glancing at my lunch. Yes, indeed it is! My Crunchy Chicken Caesar Wraps transform the classic Caesar salad into a portable feast, and they’re perfect for anyone craving a satisfying meal without the fuss. Not only can these wraps be made in a jiffy, but they also cater to every taste bud with customizable options to fit your family’s preferences—whether that’s going low-carb or simply swapping in what you have on hand. With every bite, you’ll experience a delightful crunch paired with the creamy goodness of Caesar dressing. So, are you ready to ditch the drive-thru and dive into this delicious wrap? Let’s find out how to whip up this quick and tasty treat!

Why You’ll Crave This Wrap
Versatile: These Crunchy Chicken Caesar Wraps are easily customizable to suit your dietary preferences. Swap out the chicken for grilled turkey or go for a vegetarian twist with extra veggies.
Quick and Easy: Perfect for busy weeknights, you can have a dazzling meal ready in under 30 minutes!
Kid-Approved: Family-friendly flavor makes these wraps a hit with both kids and adults alike, ensuring everyone at the table enjoys them.
Perfect for Any Occasion: Whether it’s game day, a picnic, or a simple weeknight dinner, these wraps deliver satisfying taste and crunch every time.
Crowd-Pleaser: The delightful blend of textures—crunchy, creamy, and cheesy—will have everyone coming back for seconds. Who can resist a tasty wrap that’s as fun to eat as it is to make? Give it a go, and don’t forget to check out my Chicken Shawarma Savory recipe for more quick meal ideas!
Chicken Caesar Wraps Ingredients
For the Chicken
• Prepared Chicken Tenders – Adds protein and crunch; feel free to substitute with grilled chicken or turkey bacon for variation.
For the Dressing
• Caesar Dressing – Provides creamy flavor and moisture; homemade is recommended for the best taste, but store-bought is a quick alternative.
For the Wrap
• Large Burrito-sized Tortillas – Wraps the filling together; choose whole wheat or low-carb tortillas to boost healthiness.
• Romaine Lettuce – Adds freshness and crunchy texture; mixed greens can be used for a different spin.
• Shaved Parmesan Cheese – Enhances flavor with a nutty, cheesy element; any grated cheese works too, like Pecorino Romano.
Customize these delightful Chicken Caesar Wraps with your favorite ingredients and enjoy the crunch!
Step‑by‑Step Instructions for Crunchy Chicken Caesar Wraps
Step 1: Prepare Chicken
Cook the prepared chicken tenders according to package instructions, typically placing them on a baking sheet and baking at 400°F (200°C) for 15-20 minutes until they’re golden and crispy. If you prefer homemade tenders, season and bake them until they reach an internal temperature of 165°F (74°C). This sets a crunchy foundation for your wraps.
Step 2: Make Dressing
While the chicken is baking, whip up your creamy Caesar dressing. In a bowl, mix mayonnaise, minced garlic, lemon juice, Worcestershire sauce, and grated Parmesan cheese. Stir until smooth and adjust the seasoning with salt and pepper to taste. This flavorful dressing will coat your Chicken Caesar Wraps beautifully, adding richness.
Step 3: Warm Tortillas
To ensure easy wrapping, warm your large burrito-sized tortillas. You can microwave them by wrapping in a damp paper towel for 15-30 seconds or heat in the oven at low heat for about 5 minutes. Warming helps make them pliable and prevents tearing when you fill them with delicious ingredients.
Step 4: Assemble Wraps
Lay a warmed tortilla flat on a clean surface. Add a generous handful of chopped romaine lettuce at the center, followed by 1-2 chicken tenders. Sprinkle with shaved Parmesan cheese for an extra cheesy touch, and drizzle the prepared Caesar dressing over the top. This creates a colorful, inviting base for your wraps.
Step 5: Wrap It Up
With the fillings in place, fold in the sides of the tortilla to encase the filling. Roll it tightly from the bottom up, ensuring all delicious components stay inside the wrap. Slice in half diagonally to reveal the vibrant layers within, making your Crunchy Chicken Caesar Wraps ready to serve.
What to Serve with Crunchy Chicken Caesar Wraps
Elevate your meal experience by pairing these delightful wraps with complementary dishes that enhance their flavor and texture.
-
Crispy Sweet Potato Fries: Their natural sweetness and crispiness create a wonderful contrast to the savory wraps, adding a touch of comfort that everyone will enjoy.
-
Classic Caesar Salad: Keep it on theme! A side salad elevates your meal and brings in additional crunchy greens with tangy dressing, deepening the Caesar experience.
-
Garlic Parmesan Roasted Broccoli: This vibrant, roasted side adds a nutritious boost while complementing buttery cheese notes from the wraps in every bite.
-
Coleslaw: A tangy, crunchy slaw enhances the meal’s texture and adds refreshing brightness, making every mouthful even more delightful.
-
Fruit Salad: A medley of fresh fruits introduces a bright, juicy contrast that balances the savory flavors of the wraps, making it a refreshing side.
-
Iced Lemonade: A cool glass of refreshing lemonade cuts through the richness of the wraps, providing a bright, summertime flavor that quenches your thirst.
-
Chocolate Chip Cookies: End your meal with a warm cookie; the comforting sweetness is an irresistible treat that will keep family and friends smiling.
Pair these options with your Crunchy Chicken Caesar Wraps to create a satisfying and well-rounded meal everybody will love!
Expert Tips for Crunchy Chicken Caesar Wraps
• Warm Tortillas: Heating your tortillas helps them become pliable, preventing tearing when you wrap them around your delicious filling.
• Dressing on the Side: If you’re preparing these wraps for later, consider keeping the Caesar dressing separate to avoid soggy tortillas.
• Protein Options: Don’t hesitate to customize your protein! Grilled chicken, turkey, or even chickpeas can add excitement while maintaining the essence of Chicken Caesar Wraps.
• Go Extra Veggie: Boost nutrition by adding extra veggies like bell peppers, cucumbers, or cherry tomatoes for extra flavor and crunch.
• Easy Serving: Slice the wraps in half for easier handling—perfect for kids or outdoor gatherings where finger foods shine!
Chicken Caesar Wraps Variations & Substitutions
Feel free to make these Chicken Caesar Wraps your own with these exciting twists and substitutions that will delight your taste buds.
- Grilled Chicken: Swap prepared tenders for grilled chicken breast for a healthier protein option.
- Veggie Delight: Add roasted or grilled vegetables like zucchini or bell peppers for a fresh take that boosts nutrition.
- Whole Wheat Tortillas: Choose whole wheat tortillas for added fiber and a nutty flavor that complements the wrap beautifully.
- Low-Carb Wraps: For a carb-conscious option, use lettuce wraps or jicama slices instead of tortillas for an incredibly fresh twist.
- Homemade Dressing: Make your own Caesar dressing with Greek yogurt instead of mayo for a tangy, guilt-free swap that tastes delicious.
- Spicy Kick: Add a sprinkle of red pepper flakes or drizzle sriracha into your dressing for a little heat that elevates the flavor profile.
- Cheese Variations: Substitute shaved Parmesan with feta or goat cheese for a creamier texture and unique flavor in every bite.
- Extra Crunch: Toss in some toasted nuts or seeds, like walnuts or pumpkin seeds, for a satisfying crunch that adds flavor and texture.
Embrace your creativity in the kitchen! With these variations, you can take your Chicken Caesar Wraps from basic to extraordinary, just like you can with my Spicy Maple Chicken or a zesty Chicken Poblano Soup that packs a punch of flavor. Happy wrapping!
How to Store and Freeze Chicken Caesar Wraps
Fridge: Store any leftover Chicken Caesar Wraps in an airtight container for up to 2 days. To retain the best texture, wrap tightly to avoid soggy tortillas.
Freezer: If you wish to freeze wraps, assemble them without the dressing and place in a single layer in a freezer-safe bag. They can be kept for up to a month.
Reheating: For frozen wraps, thaw in the fridge overnight, then reheat in the microwave for about 1-2 minutes, or until warmed throughout—perfect for a quick lunch!
Serving Suggestion: When ready to serve, drizzle Caesar dressing just before eating for that fresh flavor.
Make Ahead Options
These Crunchy Chicken Caesar Wraps are perfect for meal prep! You can prepare the chicken tenders up to 24 hours in advance; just cook them and store in an airtight container in the refrigerator. Additionally, make your Caesar dressing ahead of time and refrigerate it for up to 3 days to allow the flavors to meld beautifully. When ready to enjoy, warm your tortillas briefly in the microwave (15–30 seconds) to prevent tearing. Assemble the wraps with fresh romaine, chicken, and dressing just before serving, ensuring your wraps remain crisp and delightful. This prep method saves time and keeps your meal just as delicious as when freshly made!

Crunchy Chicken Caesar Wraps Recipe FAQs
How do I select the best chicken tenders?
When choosing chicken tenders, look for those that are plump and firm to the touch. If you’re opting for frozen tenders, ensure that the package is sealed without any signs of freezer burn. I often recommend checking the ingredient list for minimal additives—less is more when it comes to taste!
What is the best way to store leftover wraps?
Absolutely! Store any leftover Crunchy Chicken Caesar Wraps in an airtight container in the refrigerator for up to 2 days. To maintain their texture, wrap them tightly in plastic wrap or foil. If you’re looking for an even longer option, consider freezing them, but don’t include the dressing until you’re ready to serve.
Can I freeze Chicken Caesar Wraps and how do I do it?
Yes, you can! To freeze your Crunchy Chicken Caesar Wraps, assemble them without the dressing. Place the wraps flat in a single layer in a freezer-safe bag or container, removing as much air as possible. They can be frozen for up to 3 months. When you’re ready to enjoy, thaw them in the fridge overnight, then reheat in the microwave for about 1-2 minutes or until warmed through. Just add the dressing freshly to keep that delightful crunch!
What should I do if my wraps are soggy?
If your wraps end up soggy, this might be due to too much dressing or improper storage. To remedy this, you can try toasting the filled wrap in a frying pan for a couple of minutes on each side to crisp it up again. For future use, I recommend keeping the dressing on the side and drizzling it just before serving to maintain that perfect texture.
Are there any dietary considerations I should be aware of?
Very much! For those with dietary restrictions, keep in mind that some store-bought Caesar dressings contain anchovies or dairy. Consider a homemade dressing using vegan mayo for a delicious dairy-free alternative. Also, always double-check your chicken source to avoid any allergens. If you’re serving kids or those with specific allergies, be sure to adapt the ingredients accordingly!
Crunchy Chicken Caesar Wraps That Will Wow Your Taste Buds
Ingredients
Equipment
Method
- Cook the prepared chicken tenders according to package instructions, typically baking at 400°F (200°C) for 15-20 minutes.
- Mix mayonnaise, minced garlic, lemon juice, Worcestershire sauce, and grated Parmesan cheese in a bowl to make dressing.
- Warm the burrito-sized tortillas in a damp paper towel in the microwave for 15-30 seconds or in the oven at low heat.
- Lay a warmed tortilla flat, add chopped romaine lettuce, 1-2 chicken tenders, shaved Parmesan, and drizzle with Caesar dressing.
- Fold in the sides of the tortilla and roll tightly from the bottom up, then slice in half diagonally to serve.