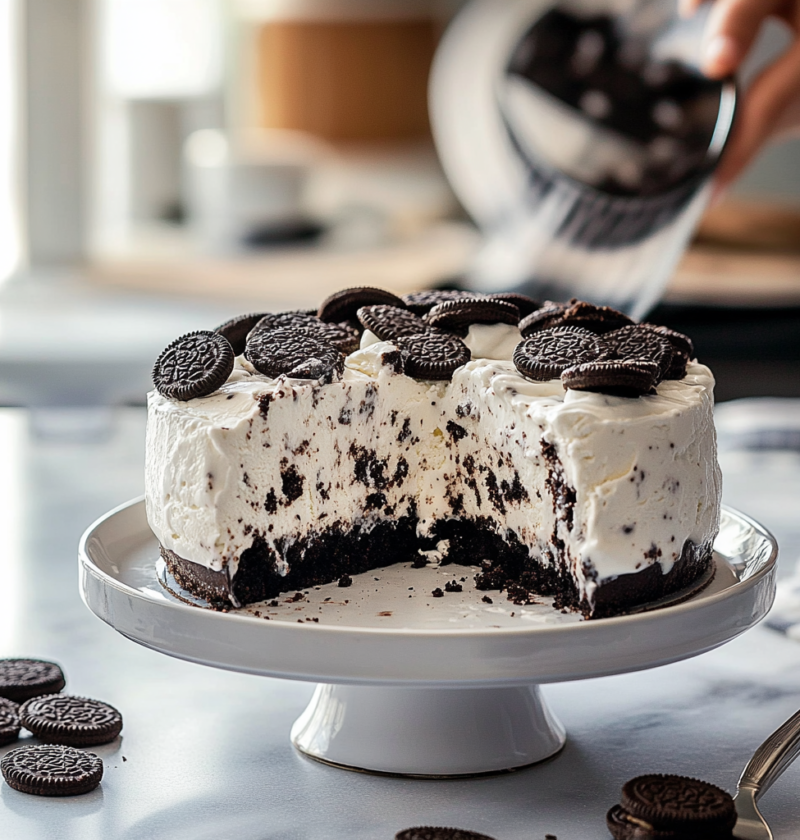
This no-bake dessert is a creamy, frozen treat featuring a crunchy chocolate cookie crust, rich ice cream filling, and decadent topping. It delivers a delightful combination of textures that make it perfect for any celebration. The flavors are balanced and the preparation method ensures that the cake remains easy to slice.
Why This Recipe Works
This simple creation works because it relies on layering techniques that maximize flavor and structural integrity. The ice cream layer benefits significantly from the buttery, crumbly base that grounds the entire dish. You achieve a satisfying crunch in every bite without worrying about complex baking skills.
The frozen nature of the cake means you have plenty of time to prepare it in advance. It is an excellent option for holiday gatherings or birthday parties where you want a dessert that does not require immediate attention. The combination of sweet ice cream and salty fudge provides a classic flavor profile that appeals to everyone.
You will find that the texture remains consistent even after the cake sits in the freezer. The heavy cream topping adds extra lightness and prevents the layers from becoming too solid or icy. This method guarantees that each slice holds together well, which is crucial for a cake of this type.
Chef Tips for Perfect Results
Ensure the ice cream is softened properly before layering it into the mixture for the best spreadability.
- Softening is key: Let the ice cream sit at room temperature until it is spoonable but not melting completely into a soup.
- Springs form pan advantage: Using a 9-inch springform pan allows for easy removal of the frozen cake rings.
- Crumb mixture texture: Process the cookies until they are very fine to avoid large chunks during serving.
- Prevent freezer burn: Cover the cake tightly with plastic wrap before placing it in the freezer for long-term storage.
- Warm knife technique: Use a warm knife to slice the cake cleanly without shattering the delicate ice cream layers.
- Fudge consistency: Warm the fudge just enough to make it pourable without making the ice cream layer too thin.
- Cream texture: Whip the heavy cream to stiff peaks so it does not collapse under the weight of the toppings.
- Setting time: Allow at least four hours in the freezer before attempting to unmold and slice the finished cake.
Common Mistakes to Avoid
Skip the following errors to ensure your frozen cake turns out perfectly every time you serve it.
| Mistake | Why It Happens | How to Fix It |
|---|---|---|
| Soggy crust | The crust sits out too long before freezing | Chill the crust for 30 minutes before adding the filling |
| Cracked topping | The cake freezes too quickly | Let the cake temper slightly at room temperature before serving |
| Hard to slice | The ice cream is too cold and hard | Warm your knife in hot water between every cut |
| Layer separation | The filling is not spreadable enough | Stir softened ice cream until it is uniform and creamy |
| Messy cutting | Ice cream melts too fast on the plate | Plate the cake on a chilled platter before slicing |
| Too soft filling | Ice cream was not frozen long enough | Ensure the cake stays frozen for at least six hours |
| Flat frosting | Whipped cream was soft peaks or over-whipped | Whip until stiff peaks form for stability on top |
Variations and Substitutions
You can easily adapt this recipe to suit different dietary needs or flavor preferences without losing the overall structure.
| Ingredient or Element | Substitution or Variation | Impact on Flavor or Texture |
|---|---|---|
| Cookies | Use chocolate wafers instead of Oreos | Changes the cream filling to a darker chocolate taste |
| Ice Cream | Substitute with vanilla bean ice cream | Creates a milder flavor profile with visible bean specks |
| Fudge Sauce | Replace with hot caramel sauce | Makes the dessert sweeter with a buttery undertone |
| Cream Topping | Use stabilized whipped topping | Provides a lighter texture but less rich mouthfeel |
| Custard | Add a layer of cheesecake batter | Heavies up the texture with a tangy cream cheese flavor |
| Nuts | Stir in chopped chocolate almonds | Introduces a savory crunch element for contrast |
| Gluten-Free | Switch to gluten-free chocolate cookies | Maintains the crust texture without affecting taste |
Serving Suggestions and Pairings
This cake pairs beautifully with fresh fruit or classic toppings to elevate the dessert experience.
- Serve slices with a side of fresh strawberries to cut through the sweetness.
- Add a dollop of fresh whipped cream for extra richness on top of the cake.
- Pair with a cup of hot coffee to complement the chocolate notes perfectly.
- Dip chocolate-dipped cookies into a bowl of milk to serve on the side.
- Top with hot fudge sauce drizzled liberally over the slice before serving.
- Serve alongside a glass of cold milk or a chocolate beverage.
- Present with sliced bananas for a classic ice cream sundae variation.
- Offer a scoop of vanilla ice cream on the side for double creaminess.
- Pair with a berry cobbler for a double fruit dessert presentation.
- Use mint leaves to garnish the served plates for a fresh look.
- Drizzle with fruit coulis to add a tart contrast to the sweet cake.
- Enjoy with a scoop of brownie chunks for a denser, fudgy bite.
For a complete summer gathering menu, pair this cake with a fresh green salad and grilled salmon to balance the rich dessert course with lighter meals earlier in the day.
Make Ahead Options
You can prepare this dessert up to two days in advance to ensure you are not rushing on the day of the event.
Make the crust and store it covered in the freezer until you are ready to assemble the layers. Prepare the filling separately and keep it in a chilled container. When you are ready to assemble, let the ice cream soften just enough to spread smoothly over the crust. This method ensures the layers do not separate during transport if you are taking it to a party.
Allow the assembled cake to freeze for the full recommended time to ensure it holds its shape when sliced. You can also wrap individual slices in plastic wrap and store them in the freezer for up to one month without losing quality.
Storage and Reheating
Proper storage ensures the cake maintains its texture for as long as possible during the freezing process.
| Method | Duration | Instructions |
|---|---|---|
| Room Temperature | 15 minutes | Let sit briefly before serving to soften slightly |
| Refrigerator | Not recommended | Celestials may melt; store in freezer only |
| Freezer | Up to 2 months | Wrap tightly in plastic and aluminum foil |
| Reheating | Room Temp | Do not microwave; let sit on counter to soften |
| Make Ahead | 24 hours | Cover tightly and store in the freezer for freshness |
Ensure you use airtight packaging to prevent the cake from absorbing any odors from the freezer. This is especially important to maintain the pure cookie flavor throughout the storage period.
Nutritional Information
Approximate values are based on one serving and may vary depending on exact ingredients and portion size.
| Nutrient | Amount per Serving |
|---|---|
| Calories | 450 kcal |
| Protein | 5 g |
| Fat | 28 g |
| Saturated Fat | 18 g |
| Carbohydrates | 45 g |
| Fiber | 1 g |
| Sugar | 35 g |
| Sodium | 250 mg |
Frequently Asked Questions
Can you freeze this cookies and cream ice cream cake?
Yes, you can freeze this cookies and cream ice cream cake for up to two months without compromising texture. Ensure it is wrapped securely in plastic and foil to prevent freezer burn and flavor absorption from other foods.
What do you use for the crust?
You use crushed chocolate cookies mixed with melted butter to create the base for this no-bake dessert. The butter acts as a binder to hold the crumbs together once pressed into the pan.
How do you keep the cake from melting?
Keep the cake frozen until the moment you are ready to slice and serve it. A brief period on the counter makes it easier to cut without cracking the layers too much.
Can you eat this cake without freezing it again?
You can eat the cake at a cooler room temperature for a softer texture, but it should remain chilled to maintain structure. Freezing solidifies the fats and ensures clean slices when eaten.
What happens if you over-chill the ice cream?
If the ice cream is too cold, it will become difficult to spread and may crack during layering. Let it soften slightly before pouring it into the crust for a smooth application.
How long do you wait before slicing?
Wait at least 4 to 6 hours in the freezer for the layers to bond completely before attempting to cut a slice. This ensures the cake holds together when unmolded.
Conclusion
Mastering this dessert brings you a delicious no-bake option for all your sweet cravings. This cookies and cream ice cream cake offers a rich and creamy experience with every scoop or slice. You will love the combination of textures and the ease of preparation for any gathering.
Meta Block
===META_START===
SEO Title: Cookies and Cream Ice Cream Cake Recipe
Meta Description: Make a delicious Cookies and Cream Ice Cream Cake for your next party. Easy no-bake dessert recipe with oreos and fudge.
Focus Keyword: cookies and cream ice cream cake
URL Slug: cookies-and-cream-ice-cream-cake
===META_END===
Recipe Card
===RECIPE_CARD_START===
{
“title”: “Cookies and Cream Ice Cream Cake”,
“description”: “A delicious cookies and cream ice cream cake with an oreo crust.”,
“ingredients”: “For the Oreo crust: 24 Oreos, crushed; 4 tablespoons unsalted butter, melted. For the filling: 1 1/2 quarts cookies and cream ice cream, softened; 10 ounces hot fudge, about 1 cup, store-bought is fine. For the topping: 1/2 cup heavy cream; 1/2 tablespoon powdered sugar; 1/2 teaspoon vanilla extract; 8 Oreos, coarsely chopped”,
“instructions”: “Process the Oreos into fine crumbs in a food processor or blender. Add melted butter and pulse until combined, or stir the butter into the crumbs in a bowl. Press the mixture firmly into the bottom and slightly up the sides of a 9-inch springform pan and chill for 30 minutes. Let the cookies and cream ice cream soften, stir until spreadable, then pour it into the chilled crust and freeze for at least 1 hour. Warm the hot fudge until pourable but not hot, spread it over the ice cream layer, and freeze for at least 30 minutes. Whip the heavy cream, powdered sugar, and vanilla to stiff peaks. Spread over the fudge layer, sprinkle with chopped Oreos, and press gently to secure. Freeze 4 to 6 hours or overnight. Let sit 15 to 20 minutes before removing the pan ring, slicing with a warm knife, and serving.”,
“prep_time”: “30 mins”,
“cook_time”: “0 mins”,
“total_time”: “5 hours”,
“yield”: “12 slices”,
“category”: “Desserts”,
“cuisine”: “American”,
“calories”: “450 kcal”,
“protein”: “5 g”,
“fat”: “28 g”,
“carbohydrates”: “45 g”,
“fiber”: “1 g”,
“sugar”: “35 g”,
“sodium”: “250 mg”
}
===RECIPE_CARD_END===
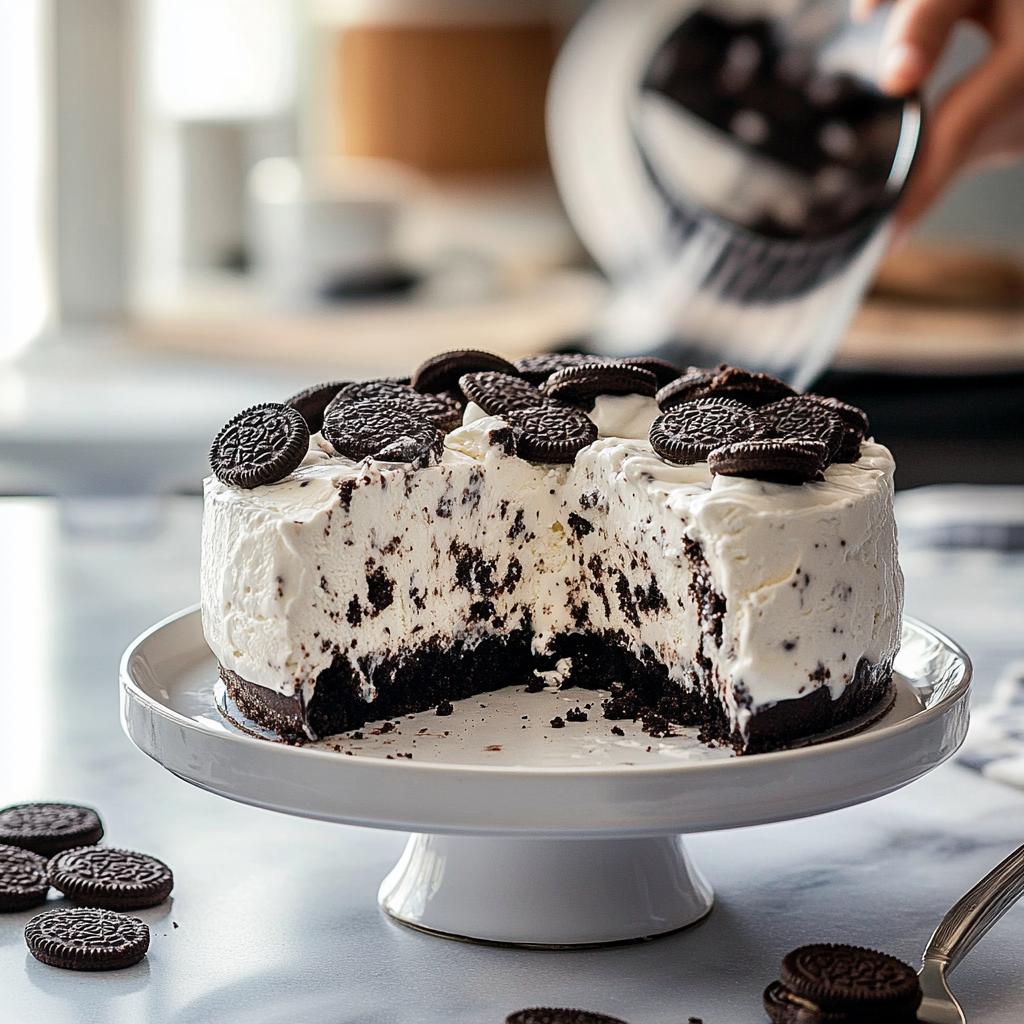
Cookies and Cream Ice Cream Cake Recipe
Ingredients
Method
- Preheat the oven to 350°F (175°C) if you're using homemade cookies or skip this step for store-bought.
- Grind the chocolate cookies into fine crumbs using a food processor or blender.
- Combine the cookie crumbs with brown sugar and melted butter until crumbly but holds together when pressed.
- Press the mixture into the base of a 9-inch springform pan. Chill in the refrigerator for 20-30 minutes.
- Spread softened vanilla ice cream evenly over the crust and freeze for 15 minutes.
- In a small saucepan, melt chocolate chips until smooth. Warm the fudge slightly for pourability.
- Pour the fudge over the ice cream layer and freeze for another 30 minutes.
- In a bowl, whip heavy cream, powdered sugar, and vanilla extract until stiff peaks form.
- Spread the whipped cream over the fudge layer.
- Cover the cake and freeze for at least 4 hours, preferably overnight.
- To serve, use a warm knife to slice neatly through the cake.
Nutrition
Notes
Ensure the ice cream is softened but not melted for smooth spreading.
A springform pan makes unmolding easier.
Cover the cake tightly to prevent freezer burn.
Let the cake sit for 5 minutes at room temperature before slicing for cleaner cuts.